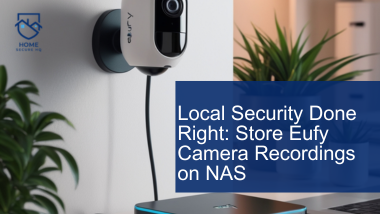
Your home, your rules, right? Do you want to securely store Eufy Camera recordings on NAS with no cloud needed? For homeowners who prioritize privacy, using cloud storage for security footage can sometimes feel like a compromise.
However, Network Attached Storage (NAS) solutions offer a way to keep your security data fully within your control. Eufy, a popular provider of smart home products, enables its camera users to save recordings directly onto a NAS.
This guide will walk you through how to set up a secure, cost-effective, and fully private surveillance system by configuring your Eufy cameras to record on a NAS.
Why Choose NAS Storage for Eufy Camera Recordings?
1. Enhanced Privacy
The ability to keep your surveillance footage within your local network provides a significant advantage in terms of privacy. When footage is saved to the cloud, it’s stored on third-party servers, where data is potentially vulnerable to unauthorized access.
Local NAS storage keeps your data secure within your home, allowing only users with network access to view recordings.
2. Cost Savings
Cloud storage usually requires monthly fees for storage space, which can add up over time. With a NAS, you avoid these recurring costs. While there is an upfront cost for the NAS device and storage drives, these expenses are one-time investments.
3. Scalable Storage Options
A NAS system allows you to expand storage capacity as needed, making it ideal for growing households or users who need high-quality, long-duration recordings. Most NAS devices allow for additional drives or storage upgrades, so you can keep footage for as long as you need without worrying about data limits.
4. Centralized Management
With NAS, you can easily manage multiple cameras, view live feeds, and organize recordings within one application. Many NAS systems come equipped with dedicated surveillance software, simplifying the process of configuring your home security setup and managing your recorded data.
Recommended NAS Options for Eufy Cameras
There are many NAS options available, but here are some of the most compatible and user-friendly choices for Eufy camera users:
- Synology NAS: Known for its intuitive interface and powerful applications, Synology NAS devices are widely compatible with various smart home systems. Synology’s Surveillance Station app offers a straightforward way to add and manage cameras.
- QNAP NAS: QNAP provides advanced multimedia features and a range of applications for file management, media streaming, and surveillance. Its QVR Pro app, specifically designed for surveillance, is user-friendly and works seamlessly with RTSP protocols.
- Western Digital My Cloud: A simpler NAS solution that prioritizes storage efficiency and ease of use, WD My Cloud is a solid choice for those who need basic file storage and streaming without extensive multimedia features.
- Asustor NAS: This NAS offers a balance of price and performance. It comes with multimedia and surveillance capabilities, allowing users to store and manage their footage efficiently.
- TerraMaster NAS: A budget-friendly alternative for smaller setups, TerraMaster offers solid performance for home or small office use at an accessible price point.
Step-by-Step Guide to Setting Up Eufy Cameras with NAS Storage
Step 1: Ensure Compatibility with Your NAS
Before connecting your Eufy cameras to your NAS, confirm that your NAS supports RTSP (Real-Time Streaming Protocol). This is the protocol that Eufy cameras use to transmit video to external storage. Most leading NAS brands, including Synology and QNAP, are compatible with RTSP, but it’s worth verifying the capability to avoid any compatibility issues.
Step 2: Enable RTSP on Your Eufy Camera
To set up NAS recording with your Eufy camera, you need to first enable RTSP streaming in the Eufy Security app. Follow these steps:
- Open the Eufy Security app on your smartphone.
- Select the camera you want to connect to your NAS.
- Go to Camera Settings > Storage > NAS (RTSP Stream).
- Toggle on the RTSP Stream option. The app will generate an RTSP URL, which you will need to configure the NAS. Make a note of this URL.
Step 3: Configure Your NAS for Surveillance
Once RTSP is enabled, it’s time to configure your NAS for recording. Different NAS brands have different software for managing surveillance. Here’s how to do it with Synology’s Surveillance Station or QNAP’s QVR Pro.
- Access the NAS control panel and open the Surveillance Station or a similar surveillance application.
- Select Add New Camera and choose the RTSP protocol.
- Enter the RTSP URL generated by the Eufy Security app in the camera configuration panel.
- Customize settings such as resolution, frame rate, and video storage duration based on your preferences. Higher resolutions provide better quality but consume more storage, so adjust these settings according to your available NAS space.
Step 4: Start Local Recording
Once the NAS detects the RTSP stream, it will automatically begin storing video from your camera. You’ll be able to view footage directly through the NAS’s surveillance application, bypassing the need for cloud services.
This setup ensures your recordings are stored locally, allowing you full control over your security data.
Optimizing NAS Storage for Eufy Cameras
To get the most out of your NAS setup, consider the following tips for optimal storage management and security:
1. Allocate Sufficient Storage Capacity
If you’re using multiple cameras or planning on storing high-quality footage, make sure you have adequate storage capacity. Surveillance footage can quickly consume storage, especially at higher resolutions.
Many NAS systems allow for additional hard drives to be installed, so keep expansion in mind if you anticipate future storage needs.
2. Organize Storage Folders for Efficient Management
Create a structured storage setup within your NAS to simplify data management. For instance, you might set up separate folders for each camera or for different time periods, such as weekly or monthly recordings. This can streamline retrieval of specific footage when needed.
3. Implement Backup Solutions for Extra Security
While a NAS provides a secure way to store data, backing up your recordings to an external drive or another NAS offers an additional layer of security. This is especially important for critical surveillance footage, as backups can protect against data loss due to hardware failure.
4. Schedule Routine Maintenance and Checks
Regularly inspect your NAS for any potential issues, such as software updates, connectivity errors, or storage health warnings. Routine maintenance ensures that your NAS functions optimally and can alert you to potential issues before they impact your security recordings.
5. Restrict Access and Enable Security Features
To further secure your NAS, restrict user access by setting strong passwords and enabling two-factor authentication (2FA). If your NAS offers options for IP restrictions or encrypted connections, enabling these features can add a layer of protection.
6. Adjust Video Quality Settings Based on Storage Needs
If storage space is a concern, you can modify the resolution or frame rate of your recordings to extend storage capacity.
Lower resolutions consume less space, though this trade-off comes at the expense of detail in the video. Find a balance that works for your surveillance requirements and storage limitations.
Conclusion
Configuring your Eufy cameras to store footage on a NAS is a smart way to gain full control over your security data while maximizing privacy and saving on subscription costs.
With the right NAS setup, you can centralize, manage, and expand your security system as needed, all while ensuring your recordings stay local and secure.
By following this guide, you can enjoy the peace of mind that comes from a robust, private surveillance system that you control from start to finish.


